While you may be scrambling for all your notes for finals, during the winter break it might be tempting to dump all of them in the trash and forget they ever existed. But instead of tossing them away, why not reuse them? Take those old papers and get into the holiday spirit by decorating your house with these 3-D snowflakes.
Materials:
Six pieces of paper
Scissors
Clear tape
Stapler
Step 1
Cut all the papers into squares.
Step 2
Fold the squares diagonally into a triangle. Fold the triangle in half.
Step 3
Cut three parallel lines along the folded edge of the triangle. Cut almost all the way to the other side.
When you’re done cutting, unfold it, and it should look like this:
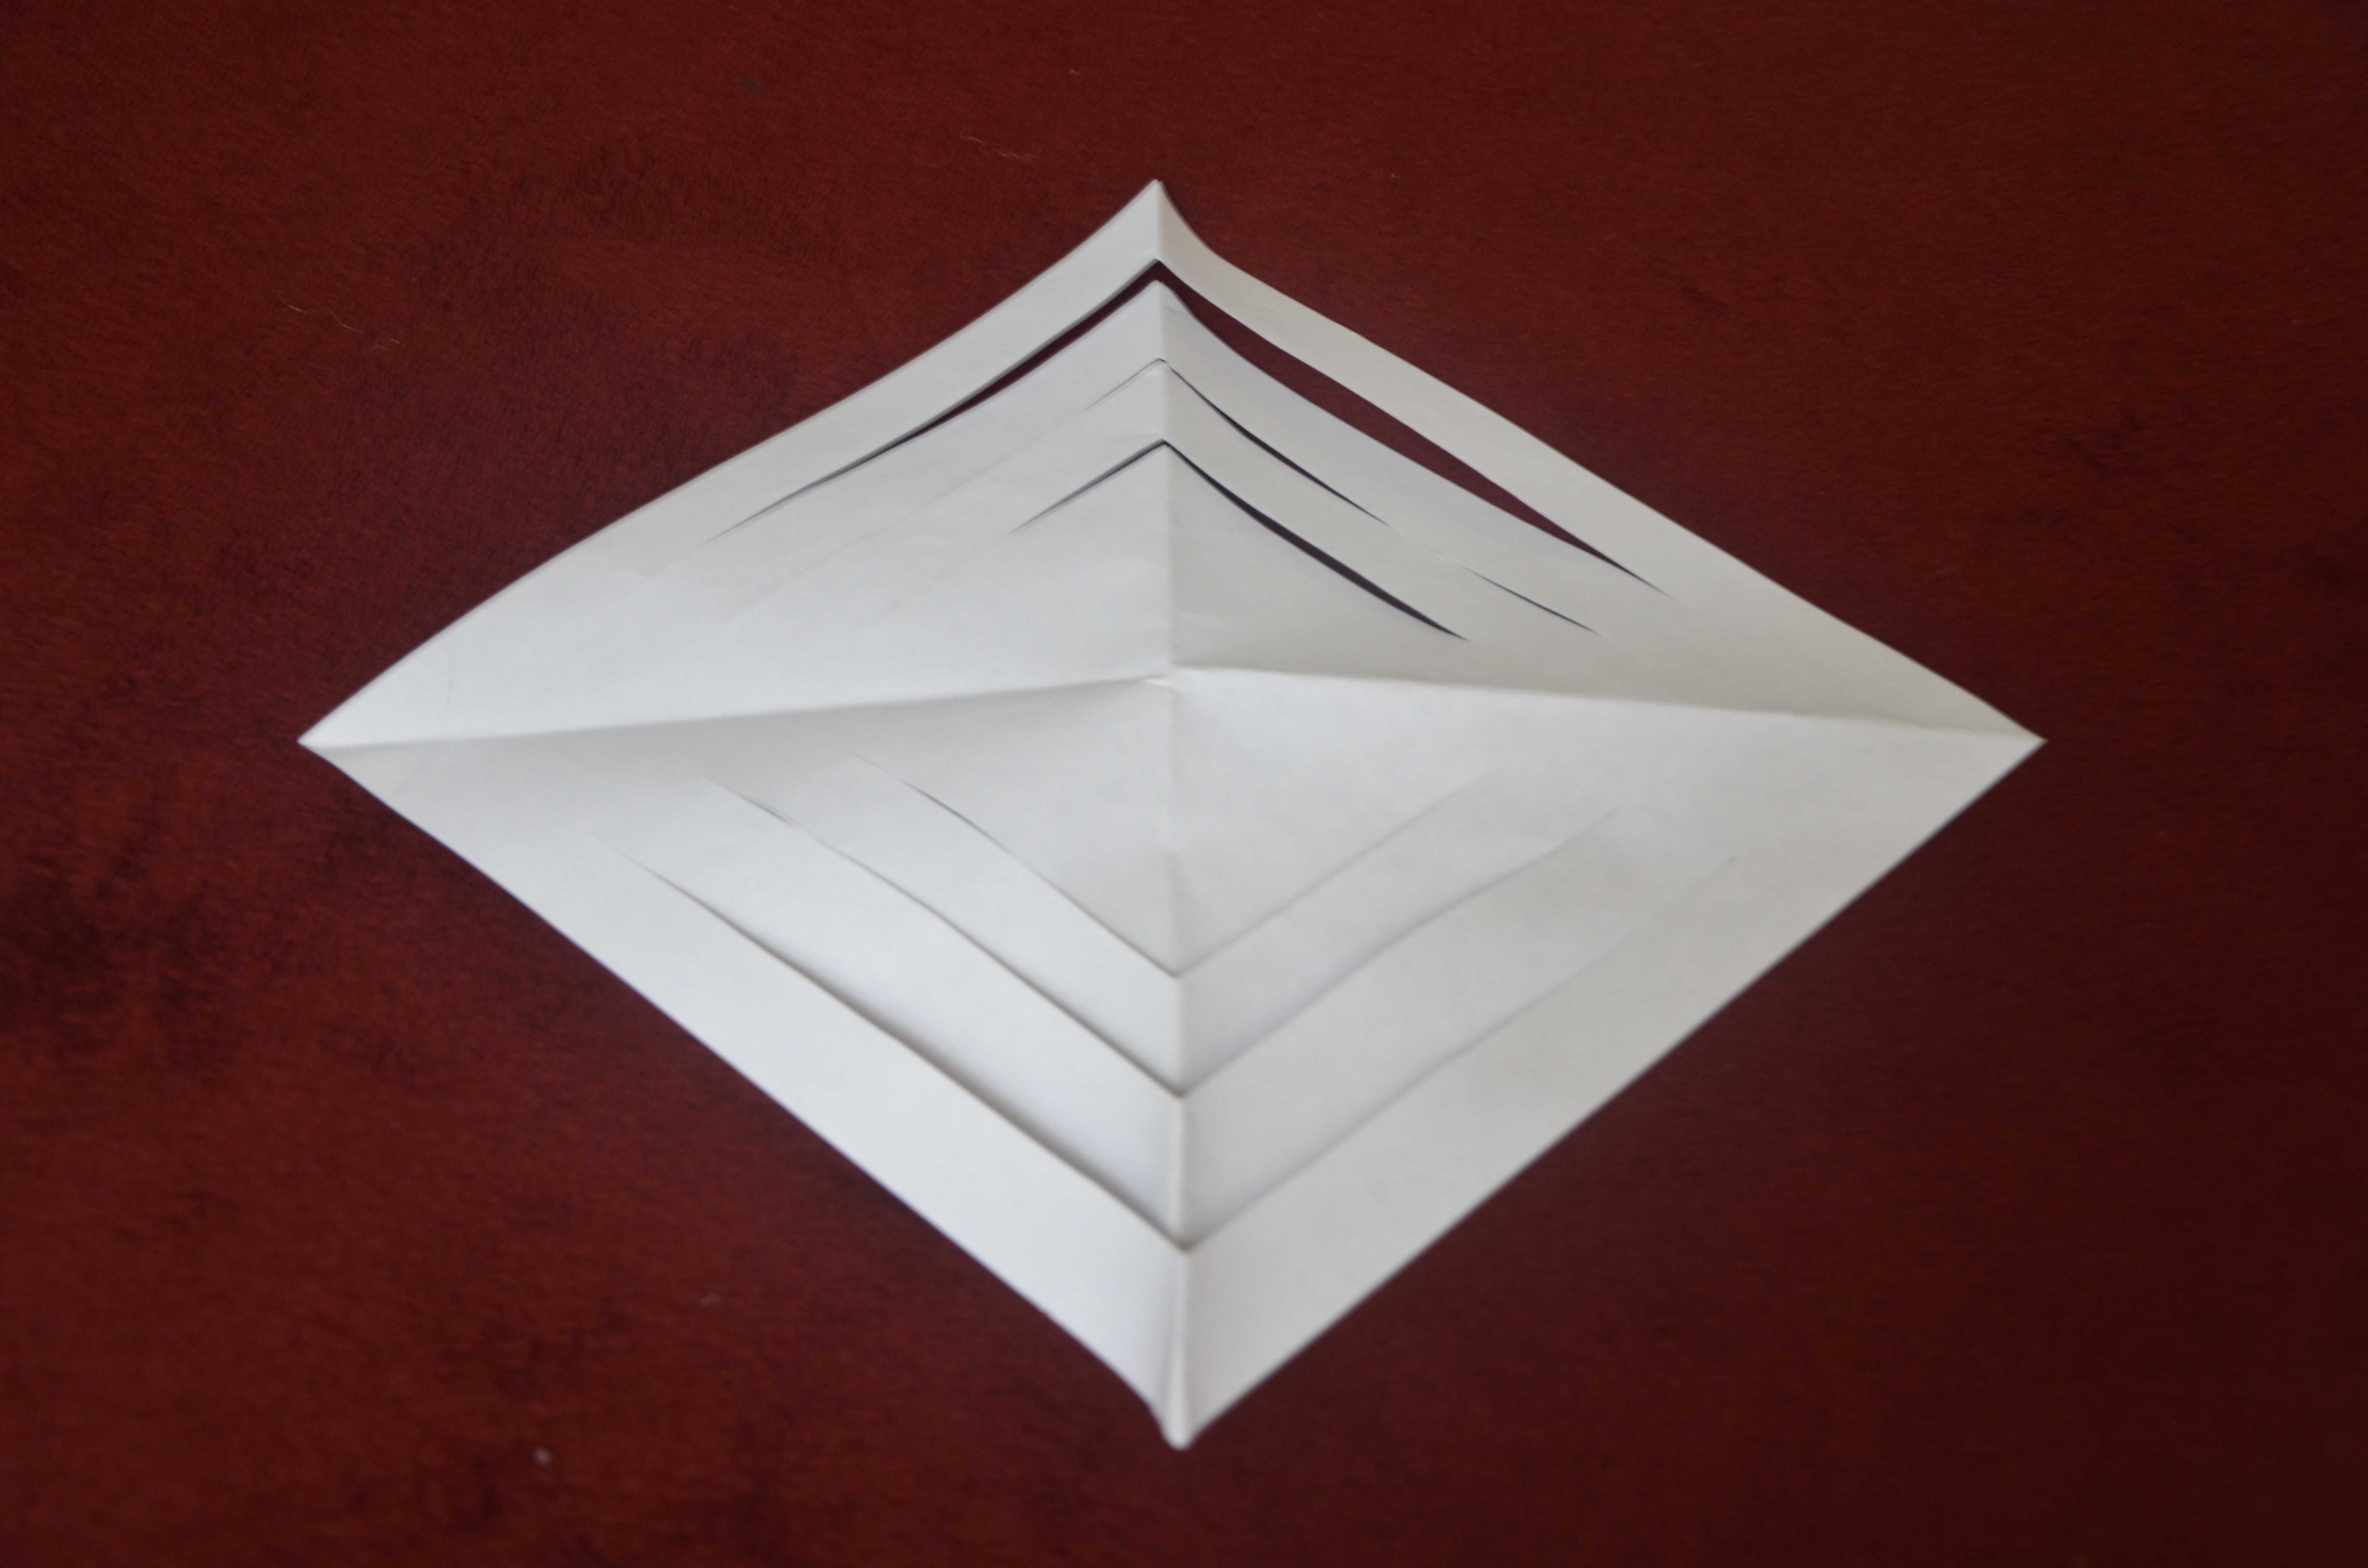
Step 4
Roll the innermost slits so they form a tube and tape the two pieces together.
Step 5
Turn the diamond on to the other side and roll the next two paper cuts into a tube, just like the one before.
Continue to turn the paper and join the cuts to form tubes until all the papers have joined.
It should look something like this:
Repeat steps 3-5 with the remaining pieces of paper.
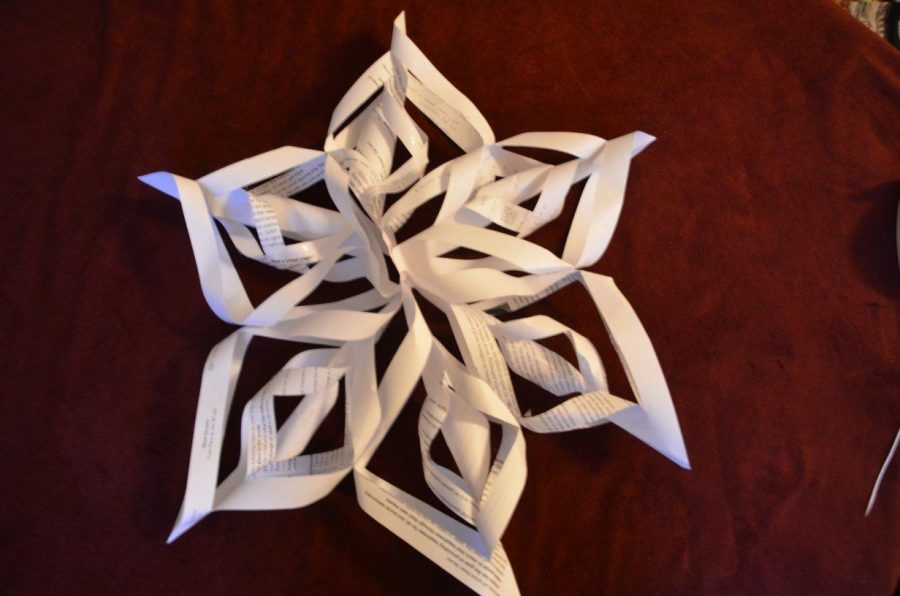
Step 6
Join three of the rolled papers together at one end and staple them together. Do the same to the other three pieces of paper.
Step 7
Staple the two parts in the middle and then staple where each of the six arms meet. This might take some maneuvering, so if you can’t do it by yourself, ask a friend to hold the pieces together for you while you staple it.
Voila, you’re done! Make as many as you’d like and have fun hanging them up around your house.